
Add Contact
Adding trusted contacts helps you share documents with the right people and ensures your family can access what they need in an emergency. Here’s how to add someone you trust:
Step 1: Find the Add Contact Button
Go to your contacts page and look for the Add Contact button in the top right corner. You’ll see your existing contacts organized by categories and trust levels, making it easy to manage who has access to what.
Step 2: Fill Out the Contact Information
Clicking the button opens a form where you can add details about the person. This information helps you organize your contacts and control who can access your vault.
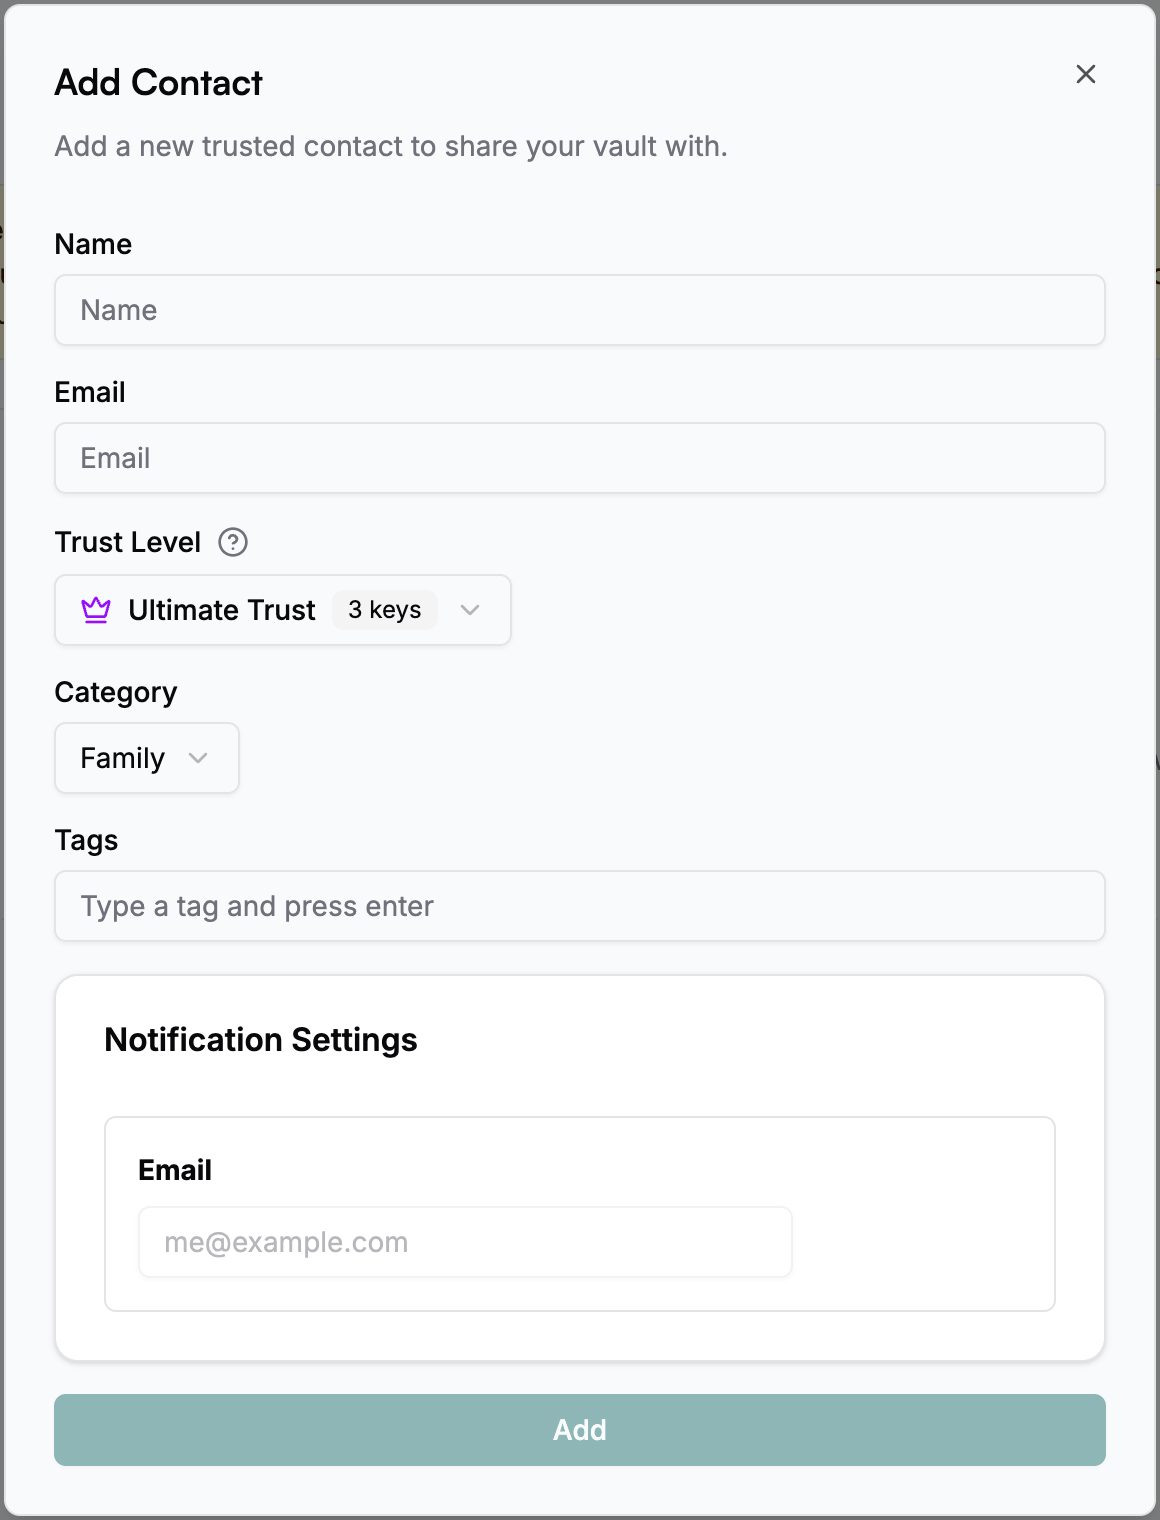
- Name: Enter their full name.
- Email: Enter a valid email address. This is needed for sharing documents and sending notifications.
- Category: Organize contacts into categories like Family, Personal, Friends, Professional, Emergency, Legal, Financial, Medical, or Other.
- Tags: Add tags to specify their role and availability (e.g., ‘primary-executor’, ‘backup-contact’, ‘emergency-only’, ‘business-hours’).
- Trust Level: Choose the trust level for this person. This controls how much access they have to your vault in an emergency.
- Notification Settings: Choose how they’ll be notified when you share documents or set up emergency access. Currently, email notifications are supported. The notification email defaults to the contact’s email address but can be customized if needed.
What is the Trust Level?
Trust levels determine how many encryption keys each person receives to access your vault in an emergency:
- Ultimate Trust (3 keys): This person can unlock your vault by themselves. Perfect for your closest family members like spouse, parents, or adult children.
- High Trust (2 keys): Needs one other trusted person to help unlock your vault. Good for close friends, siblings, or financial advisors.
- Shared Trust (1 key): Requires at least two other trusted people to unlock your vault. Suitable for extended family, neighbors, or colleagues.
Security: You need at least 3 keys total to open a vault. This system ensures that only the right combination of people you trust can access your vault, and only under the conditions you set. You can change someone’s trust level at any time.
Note: Free accounts can only use Ultimate Trust level. Upgrade to access High Trust and Shared Trust options for more flexible emergency access planning.
Step 3: Add the Contact
Once you’ve filled in the details, click Add Contact. The person will be added to your vault and you can start sharing documents with them.
You can update their information or trust level anytime. Use the category filters on the contacts page to find specific types of contacts quickly.
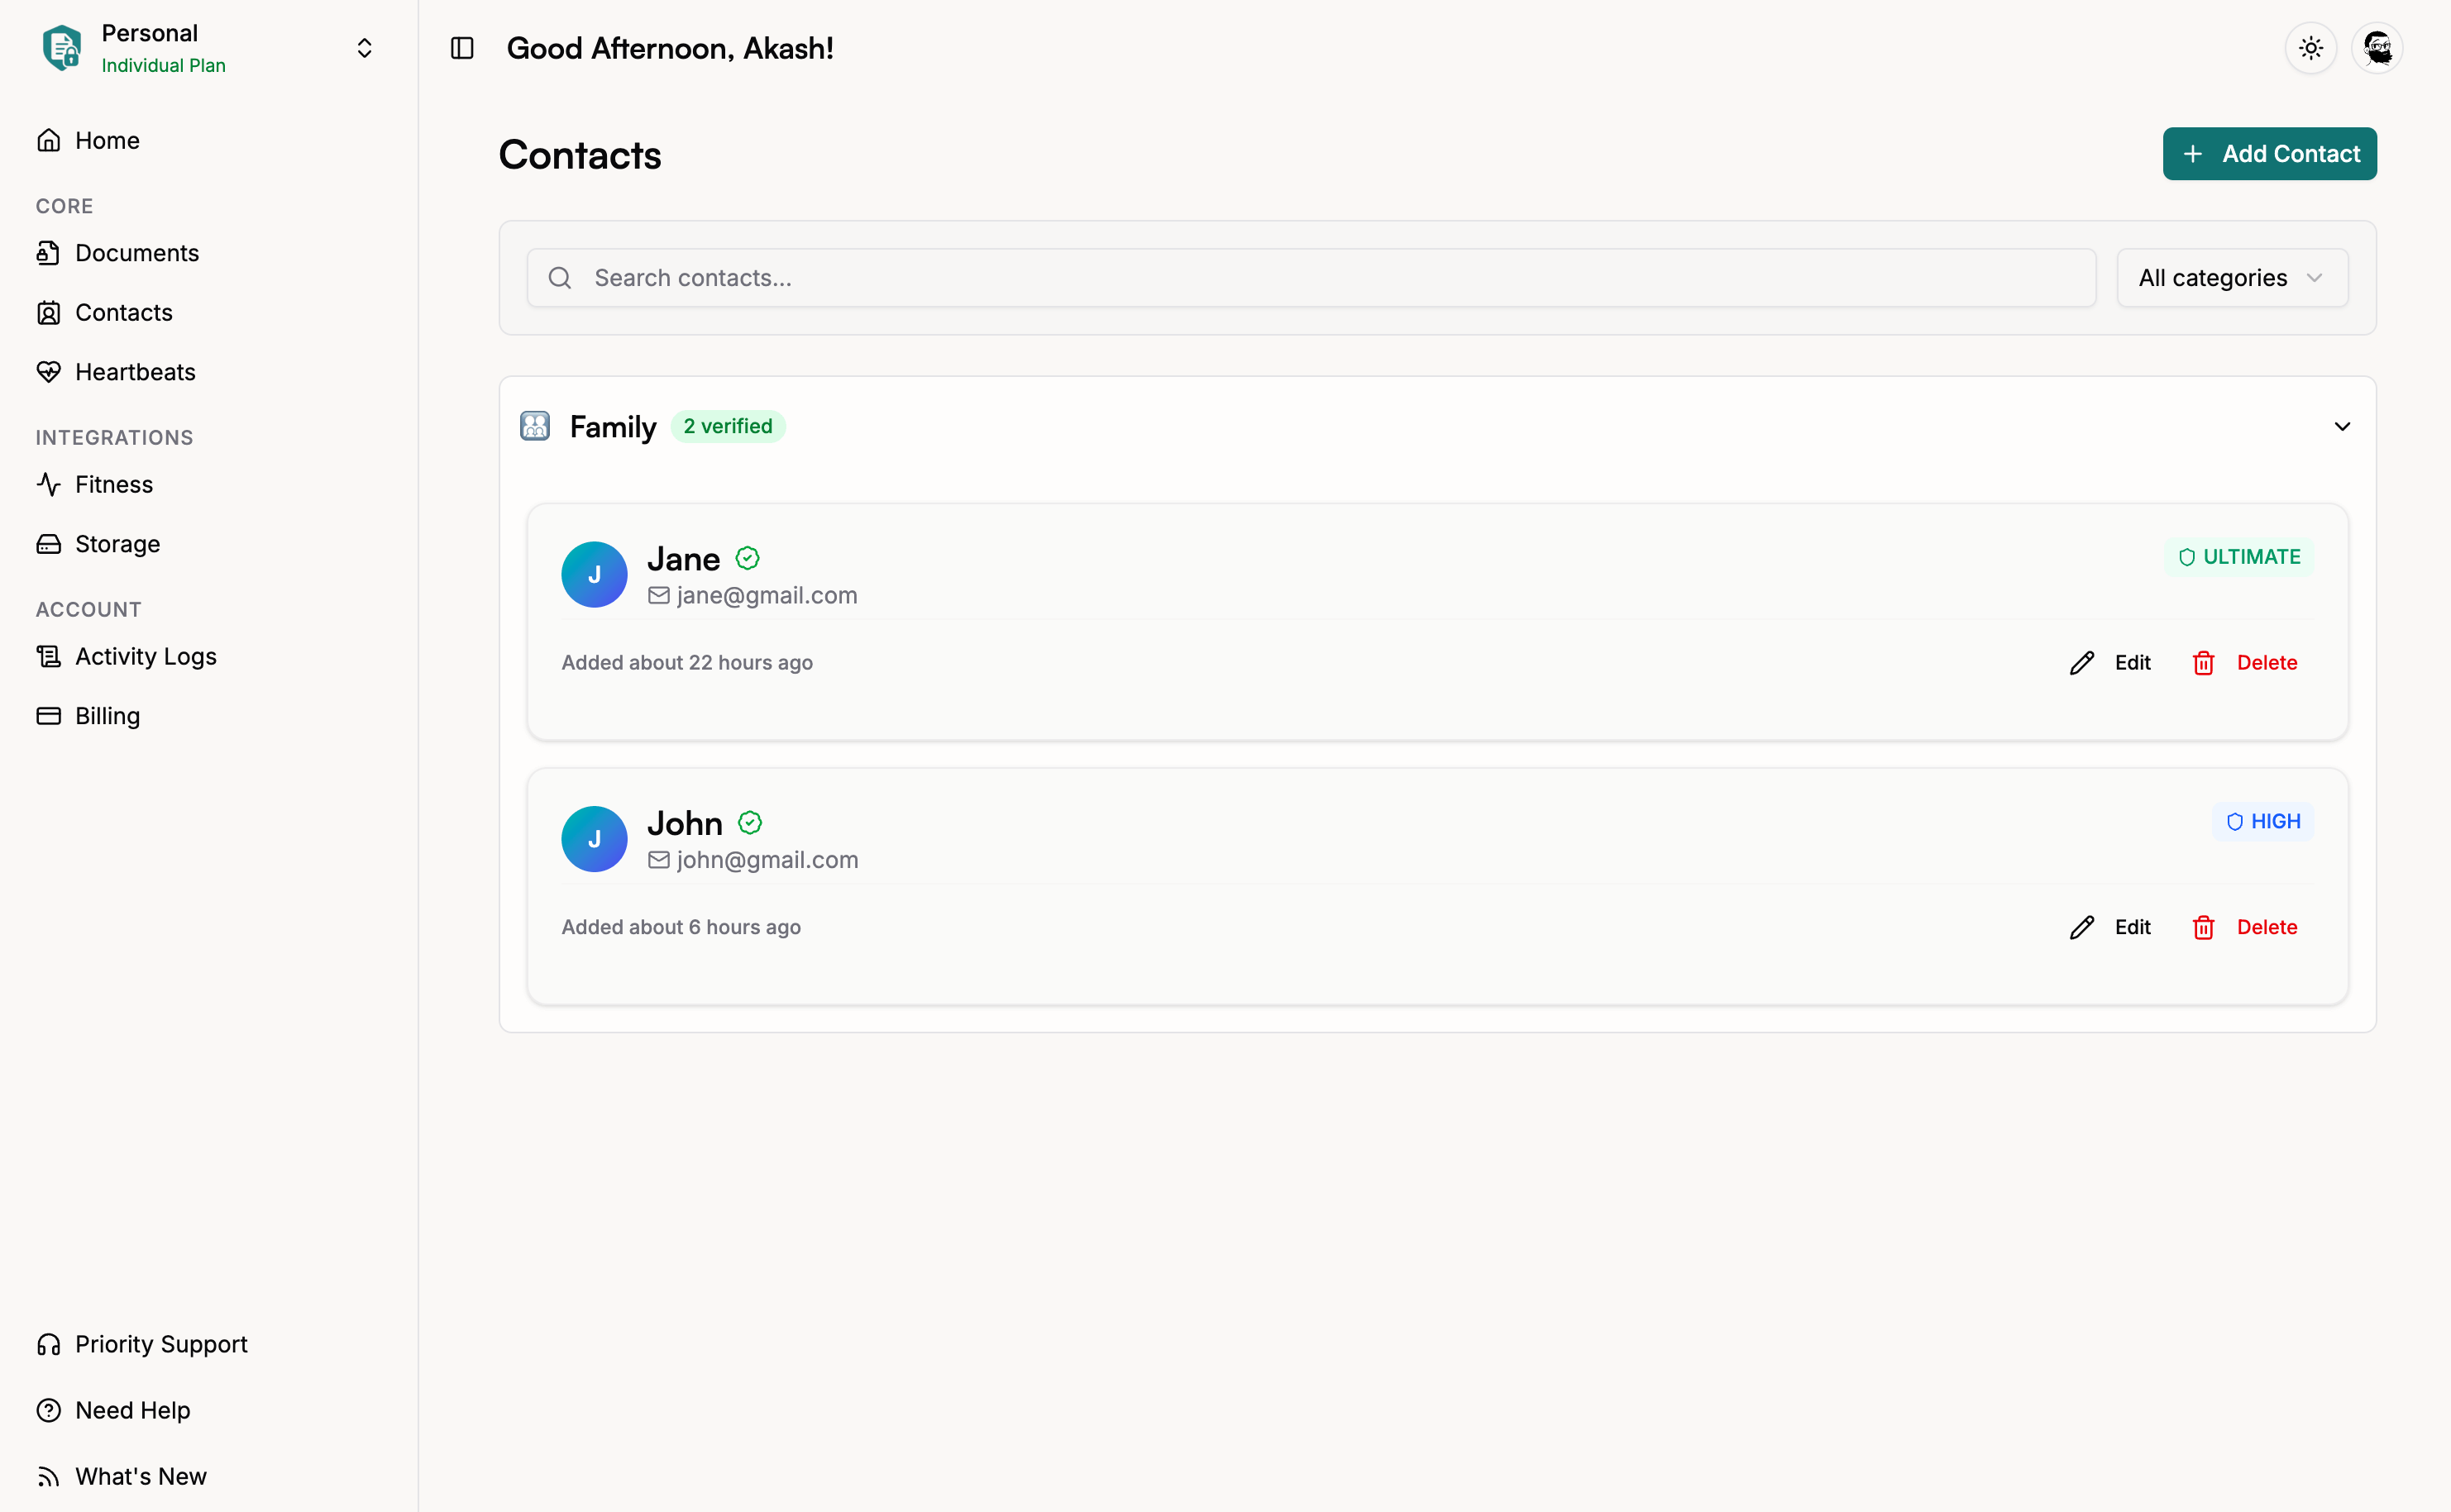
Your trusted contact will receive an email with a link to mark them as verified, here’s how their flow will look like: → You’ve Been Added as a Trusted Contact.
Why Categories and Tags Help
Categories keep things organized:
- Family: Spouse, children, parents, siblings
- Professional: Lawyers, financial advisors, accountants
- Medical: Doctors, healthcare providers
- Legal: Attorneys, executors, trustees
- Emergency: People to contact in urgent situations
Tags add more detail:
- Roles: ‘executor’, ‘trustee’, ‘beneficiary’, ‘backup-contact’
- Availability: ‘always-available’, ‘business-hours’, ‘emergency-only’
- Location: ‘local’, ‘remote’, ‘same-city’
Good organization makes it easier to find the right person when you need them.
Why am I being asked for my vault access code?
When adding a contact, you may be prompted to enter your vault access code. This happens when your current browser session doesn’t have your encryption key cached in memory. Common reasons include:
- This is your first action after logging in
- You switched browsers or devices
- Your session was inactive for an extended period
- You cleared your browser data
Security Note: Your vault access code is used to generate the encryption keys needed to create secure shares for your new contact. The access code is temporarily stored in memory for the current session only and is never sent to our servers.
What’s Next?
After adding your trusted contacts, consider: